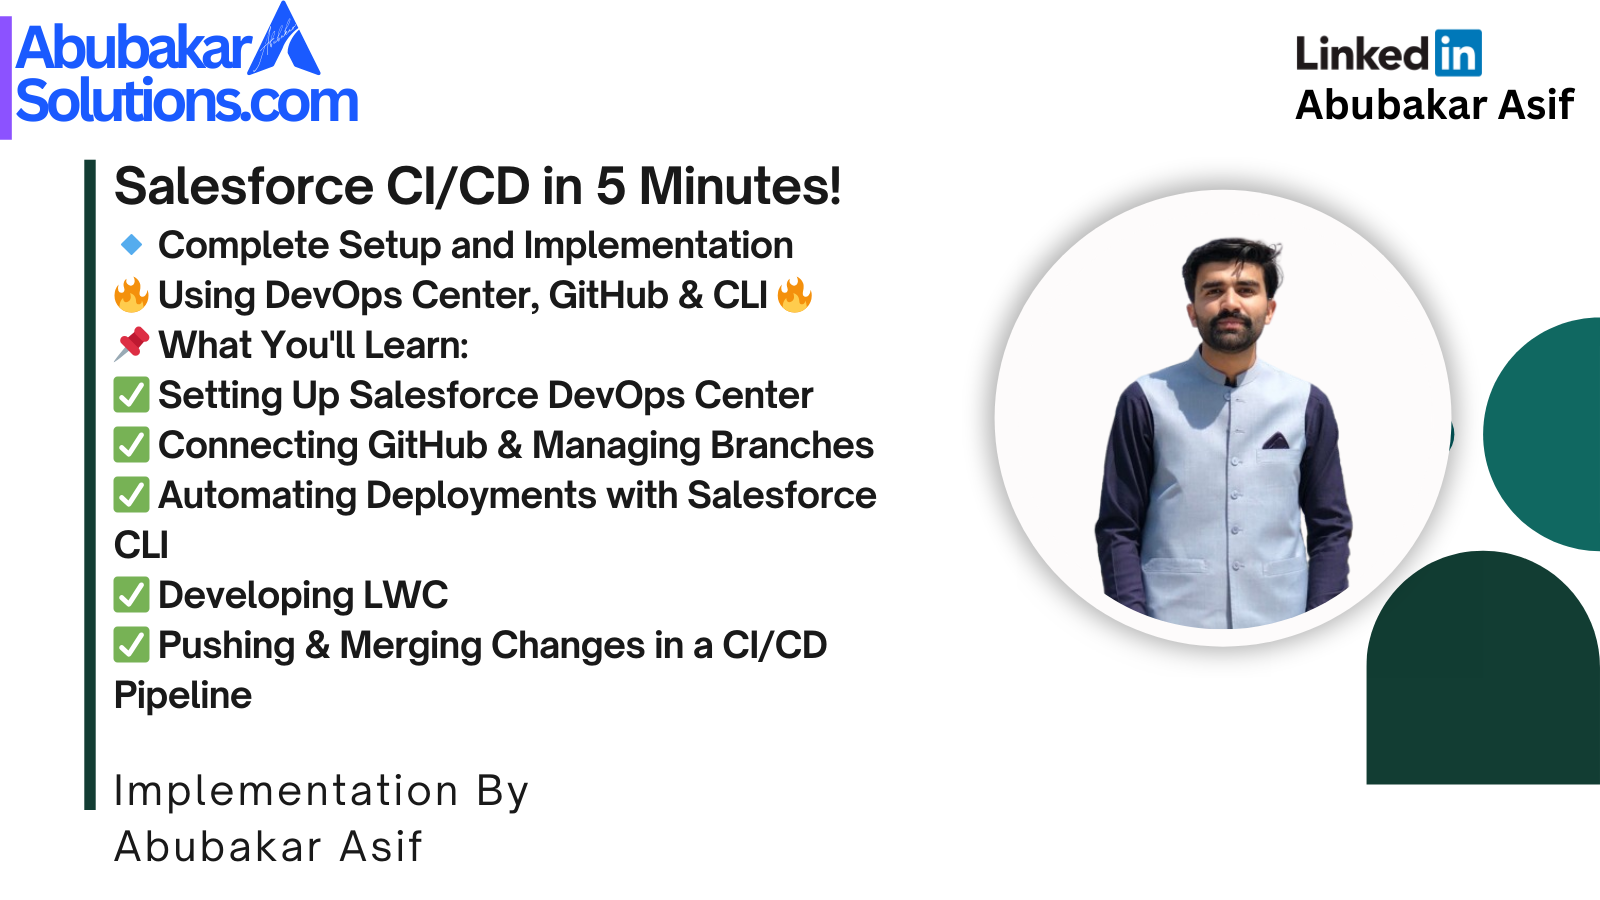
In today’s fast-paced development environment, continuous integration and continuous deployment (CI/CD) have become essential for delivering high-quality Salesforce applications efficiently. Salesforce DevOps Center, combined with GitHub and Salesforce CLI, provides a robust framework for managing custom development projects with ease. In this article, I’ll walk you through how I implemented Salesforce custom development using two different approaches: one inside the DevOps Center org and another outside the DevOps Center org using VS Code and GitHub.
Pre-requisites
Before diving into the development process, ensure you have the following tools and configurations in place:
- Visual Studio Code (VS Code): Download and install VS Code, the go-to code editor for Salesforce development.
- Salesforce CLI: Install Salesforce CLI to interact with your Salesforce orgs from the command line.
- Git: Install Git for version control and collaboration.
- Salesforce Extension Pack: Install the Salesforce Extension Pack in VS Code for seamless Salesforce development.
- GitLens and GitHub Pull Request Extensions: These extensions enhance Git functionality within VS Code.
- Salesforce DevOps Center: Install DevOps Center in your Salesforce org to manage the CI/CD pipeline.
Helpful links
Important Git and SFDX Commands
To effectively manage your Salesforce custom development process, it’s crucial to understand some key Git and Salesforce CLI (SFDX) commands. Below are the most important commands and their functionalities:
Git Commands
1. Git Fetch:
– Command: git fetch
– Functionality: Fetches the latest changes from the remote repository without merging them into your local branch. This is useful for checking what changes have been made by others before pulling them.
2. Git Push:
– Command: git push origin <branch-name>
– Functionality: Pushes your local branch changes to the remote repository. This is essential for sharing your code with the team.
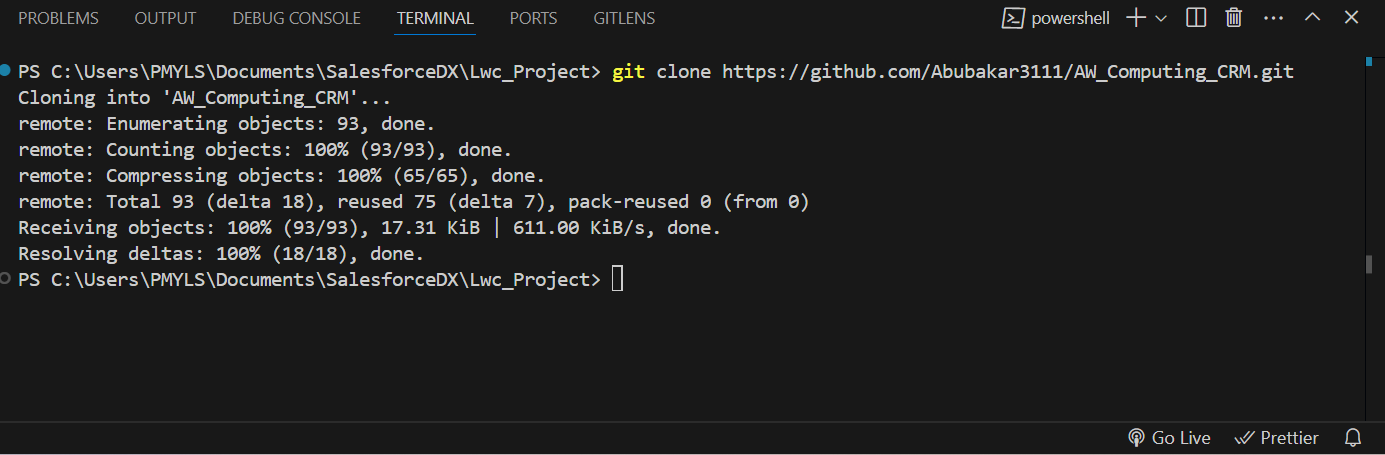
3. Git Clone:
– Command: git clone <repository-url>
– Functionality: Clones a remote repository to your local machine. For example:
4. Git Checkout:
– Command: git checkout <branch-name>
– Functionality: Switches to the specified branch. If the branch doesn’t exist locally, you can create and switch to it using:
5. Git Config:
– Command: git config –global user.email “” git config –global user.name “”
– Functionality: Configures your Git username and email, which will be used for commit messages.
Salesforce CLI (SFDX) Commands
1. SFDX Auth:
– Command: sfdx auth:web:login
– Functionality: Authenticates you to your Salesforce org using a web browser.
2. SFDX Create Project:
– Command: sfdx force:project:create -n <project-name>
– Functionality: Creates a new Salesforce DX project.
3. SFDX Push to Org:
– Command: sfdx force:source:push
– Functionality: Pushes local source code changes to a connected Salesforce org.
4. SFDX Pull from Org:
– Command: sfdx force:source:pull
– Functionality: Pulls changes from a connected Salesforce org to your local project.
5. SFDX Deploy to Org:
– Command: sfdx force:source:deploy -p <path-to-source> -u <target-org-alias>
– Functionality: Deploys source code to a specified Salesforce org.
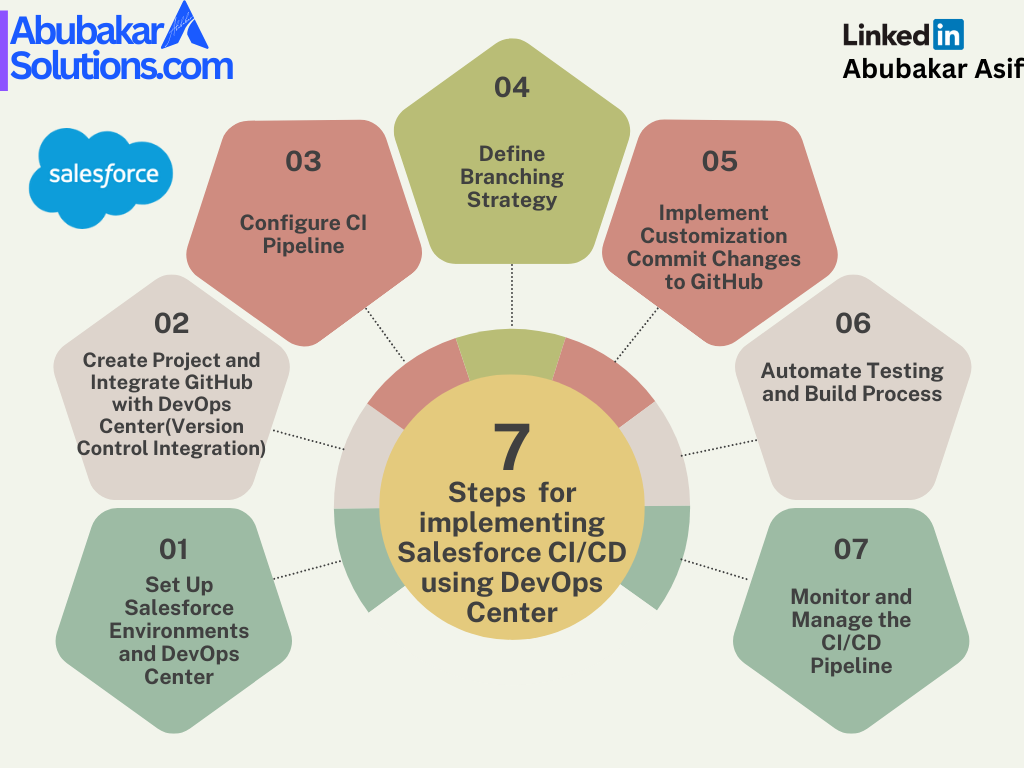
Complete Flow of Salesforce CI/CD Process
Before diving into the complete step-by-step implementation, it’s essential to understand the overall flow of CI/CD in Salesforce using DevOps Center, GitHub, and Salesforce CLI. This approach integrates version control, automation, and deployment to streamline your Salesforce development lifecycle. It ensures a smooth and consistent process for managing code, configurations, and changes across environments, which helps reduce errors and accelerate the release cycle. Once you understand this high-level flow, the step-by-step implementation will be much easier to follow and comprehend.
Now, let’s explore the complete flow!
Step 1: Admin/DevOps Manager Creates Project and Sets Repository
– The admin or DevOps manager creates a new project in Salesforce DevOps Center.
– The project is connected to a GitHub repository.
– Each stage in the pipeline is linked to a specific branch in the GitHub repository.
Step 2: Assign DevOps Permission Sets
– The admin assigns the necessary DevOps Center permission sets to users responsible for development, testing, and release management. These include:
– DevOps Center: Base permission set for managing customizations.
– DevOps Center Manager: For setting up projects, environments, and users.
– DevOps Center Release Manager: For promoting changes through the pipeline.
– sf_devops_InitializeEnvironments: For managing environment connections.
– sf_devops_NamedCredentials: For accessing named credentials.
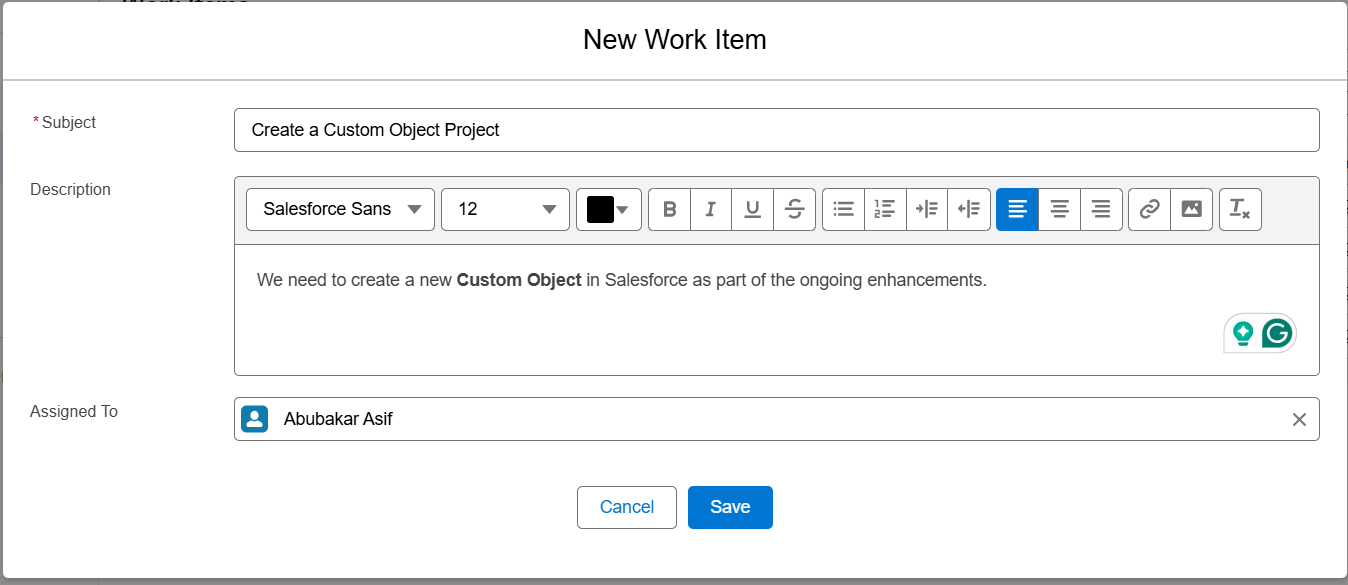
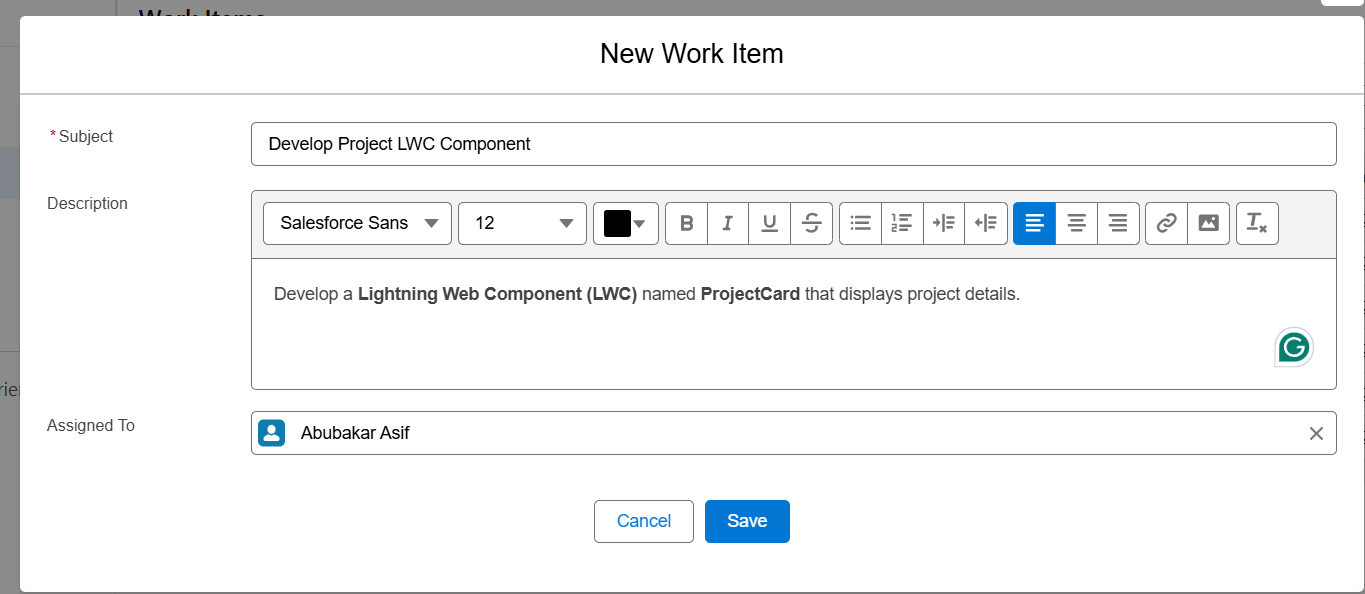
Step 3: Create Work Items
– The admin creates work items (tasks) in DevOps Center and assigns them to the corresponding developers.
– Developers log in to Salesforce and navigate to DevOps Center, where they can see the work items assigned to them.
Step 4: Developer Implements Changes
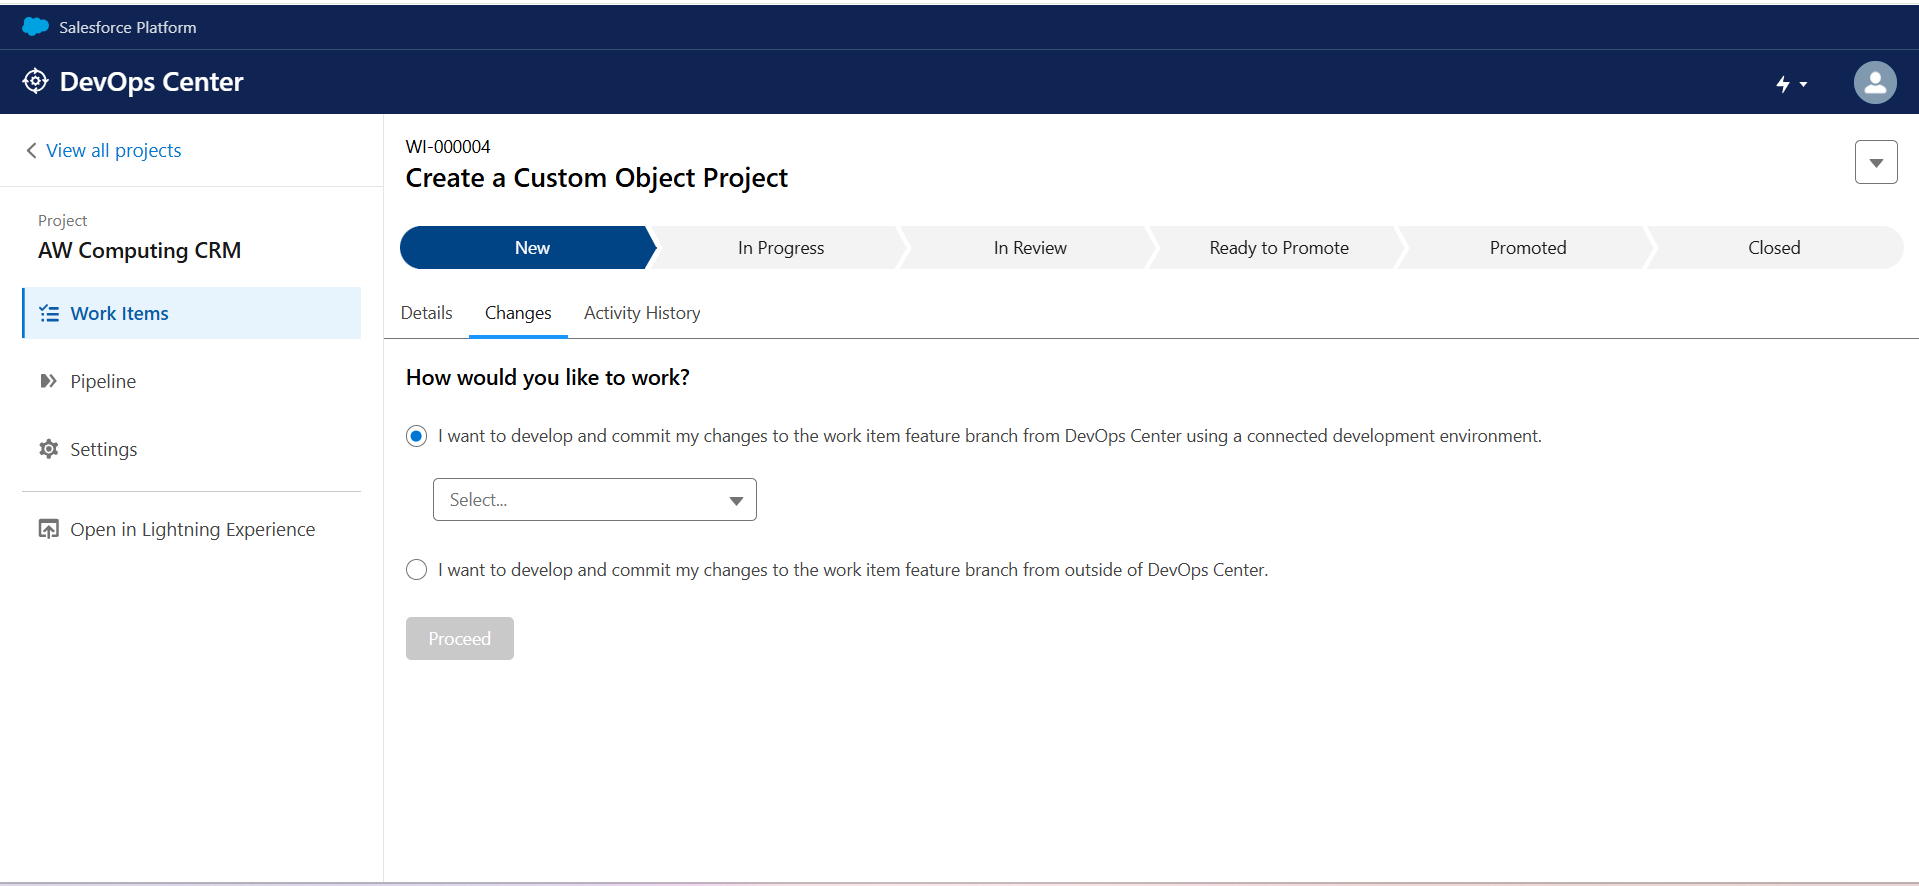
– The developer has two options for implementing changes:
Option 1: Implement Inside the Org
– The developer clicks on the work item in DevOps Center, which opens the connected Salesforce org.
– The developer makes the necessary changes (e.g., creating custom objects, Apex classes, etc.) directly in the org.
– Once the changes are complete, the developer returns to DevOps Center, where they can see all the changes made.
– The developer pulls the changes and creates a review request.
Option 2: Implement Outside the Org (Using VS Code and GitHub)
– The developer uses VS Code to connect to the GitHub repository and creates a new branch for the work item.
– The developer implements the changes locally and pushes the code to the assigned branch in GitHub.
– A pull request is created in GitHub for code review.
Step 5: Code Review and Testing
– The QA team reviews the changes in GitHub or DevOps Center.
– Once the changes are approved, the QA marks them as Ready to Promote.
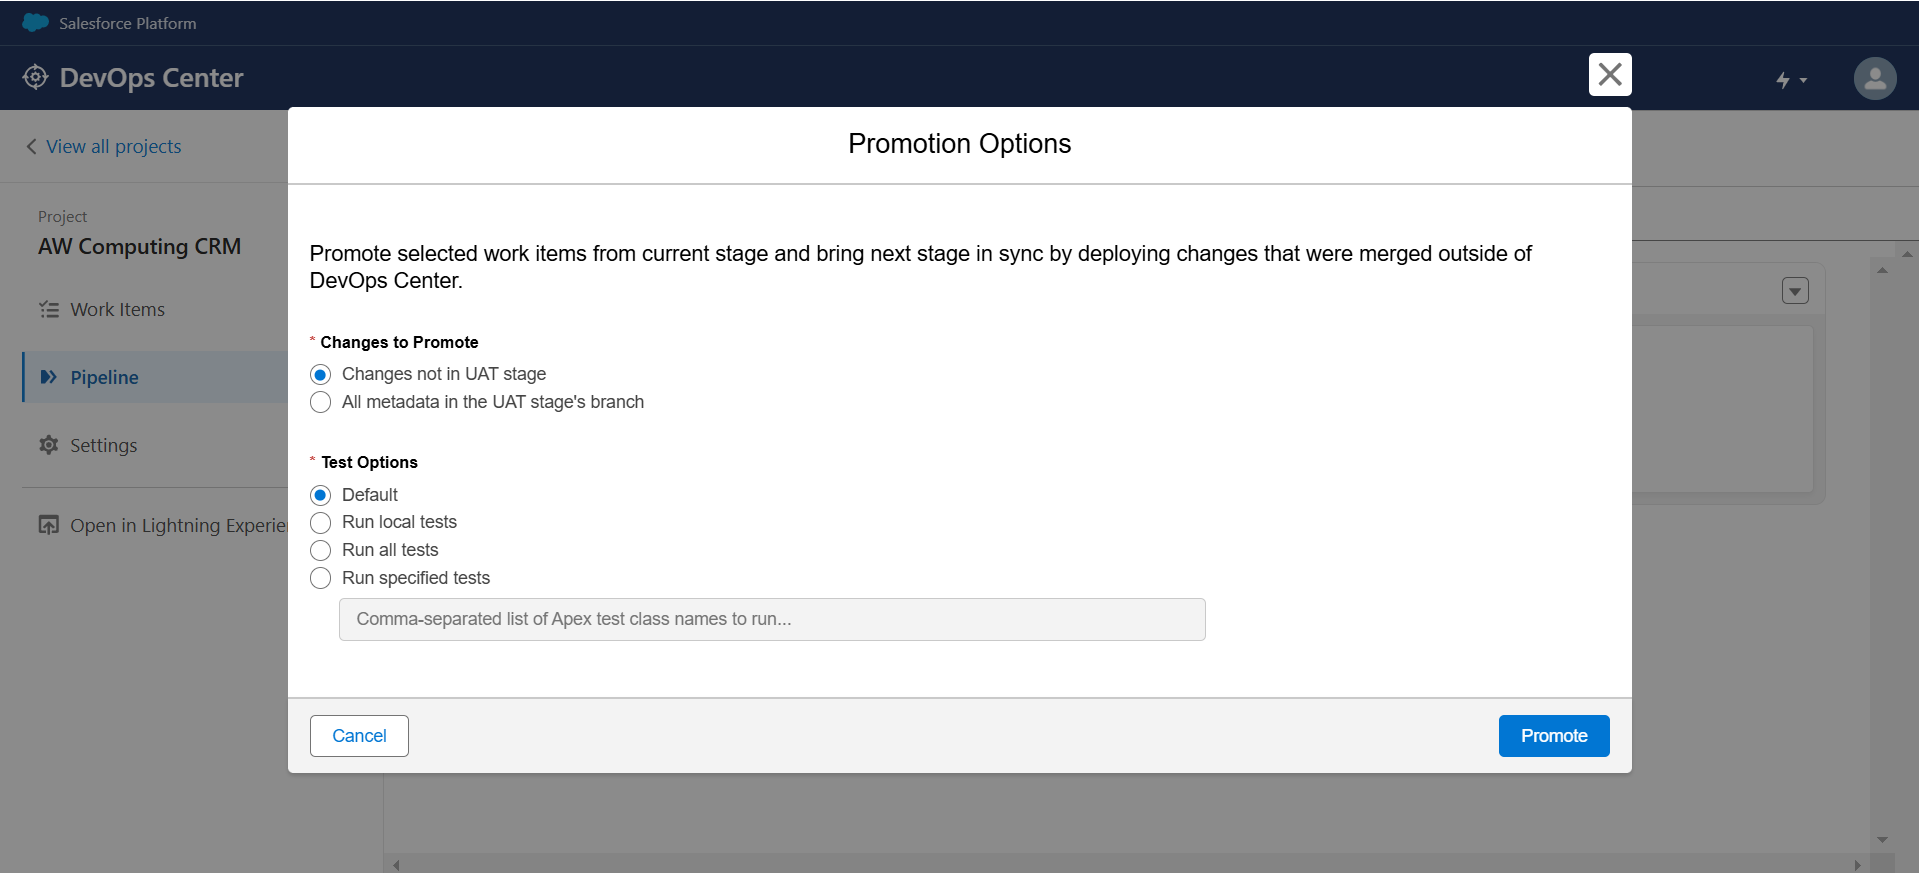
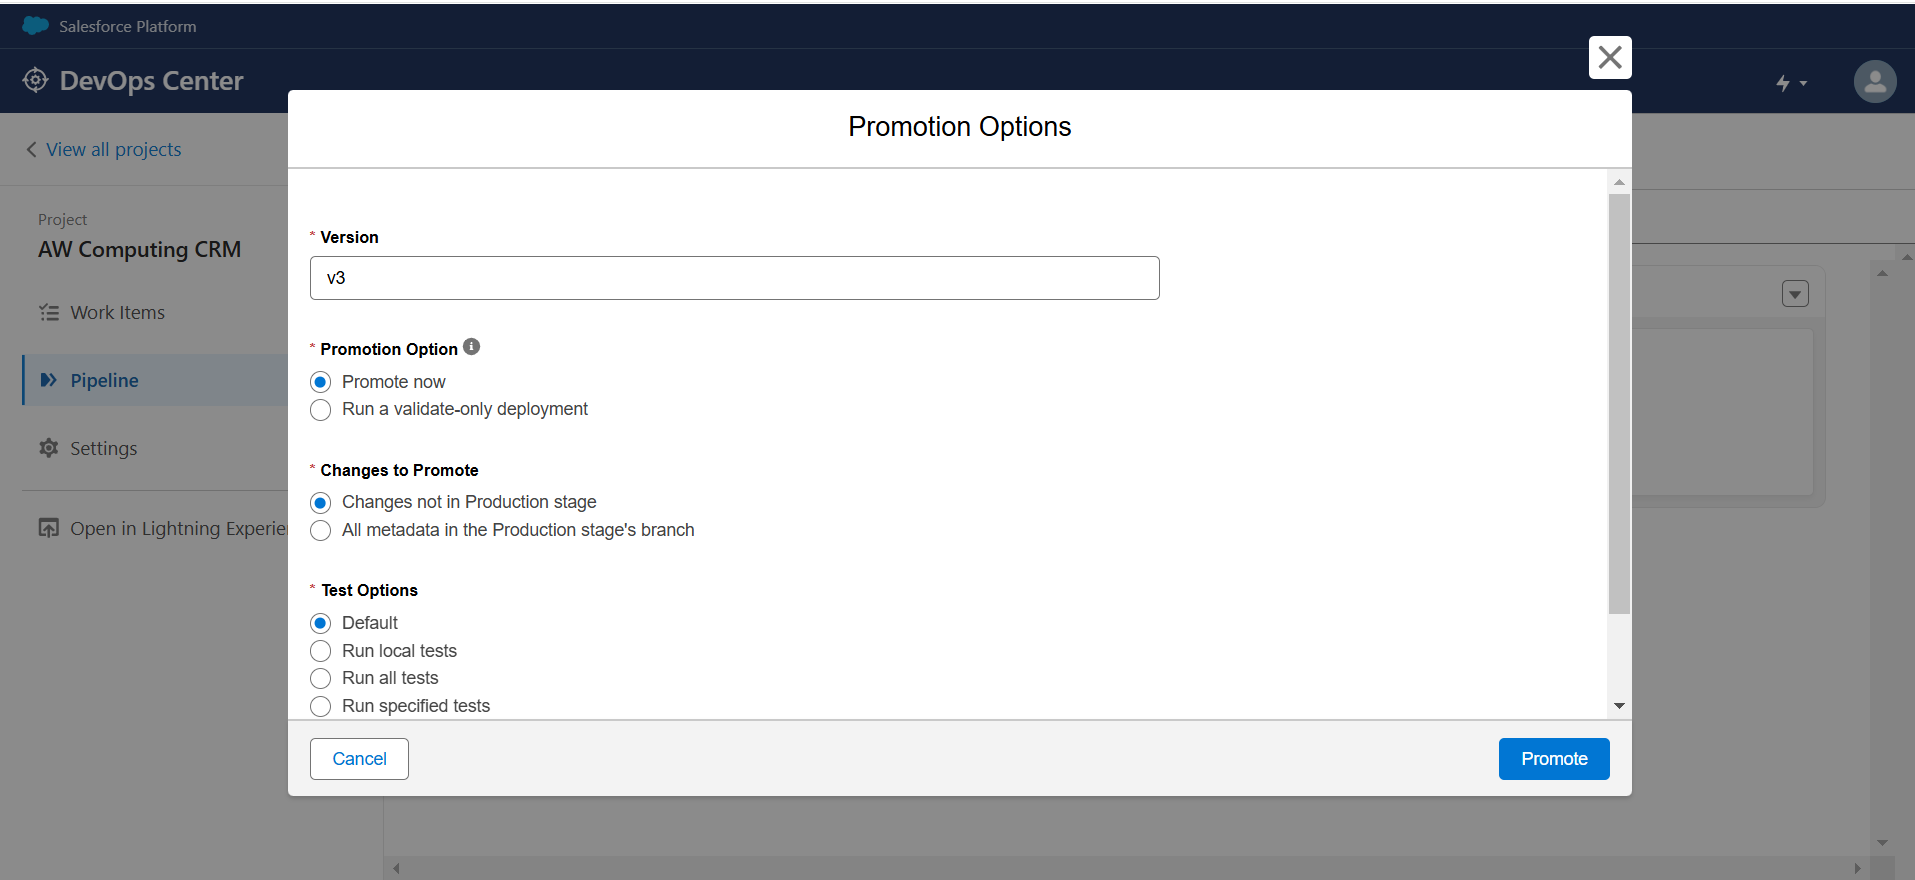
Step 6: Promote Changes to UAT
– The release manager promotes the changes from the development branch to the UAT branch.
– The changes are deployed to the UAT environment for further testing.
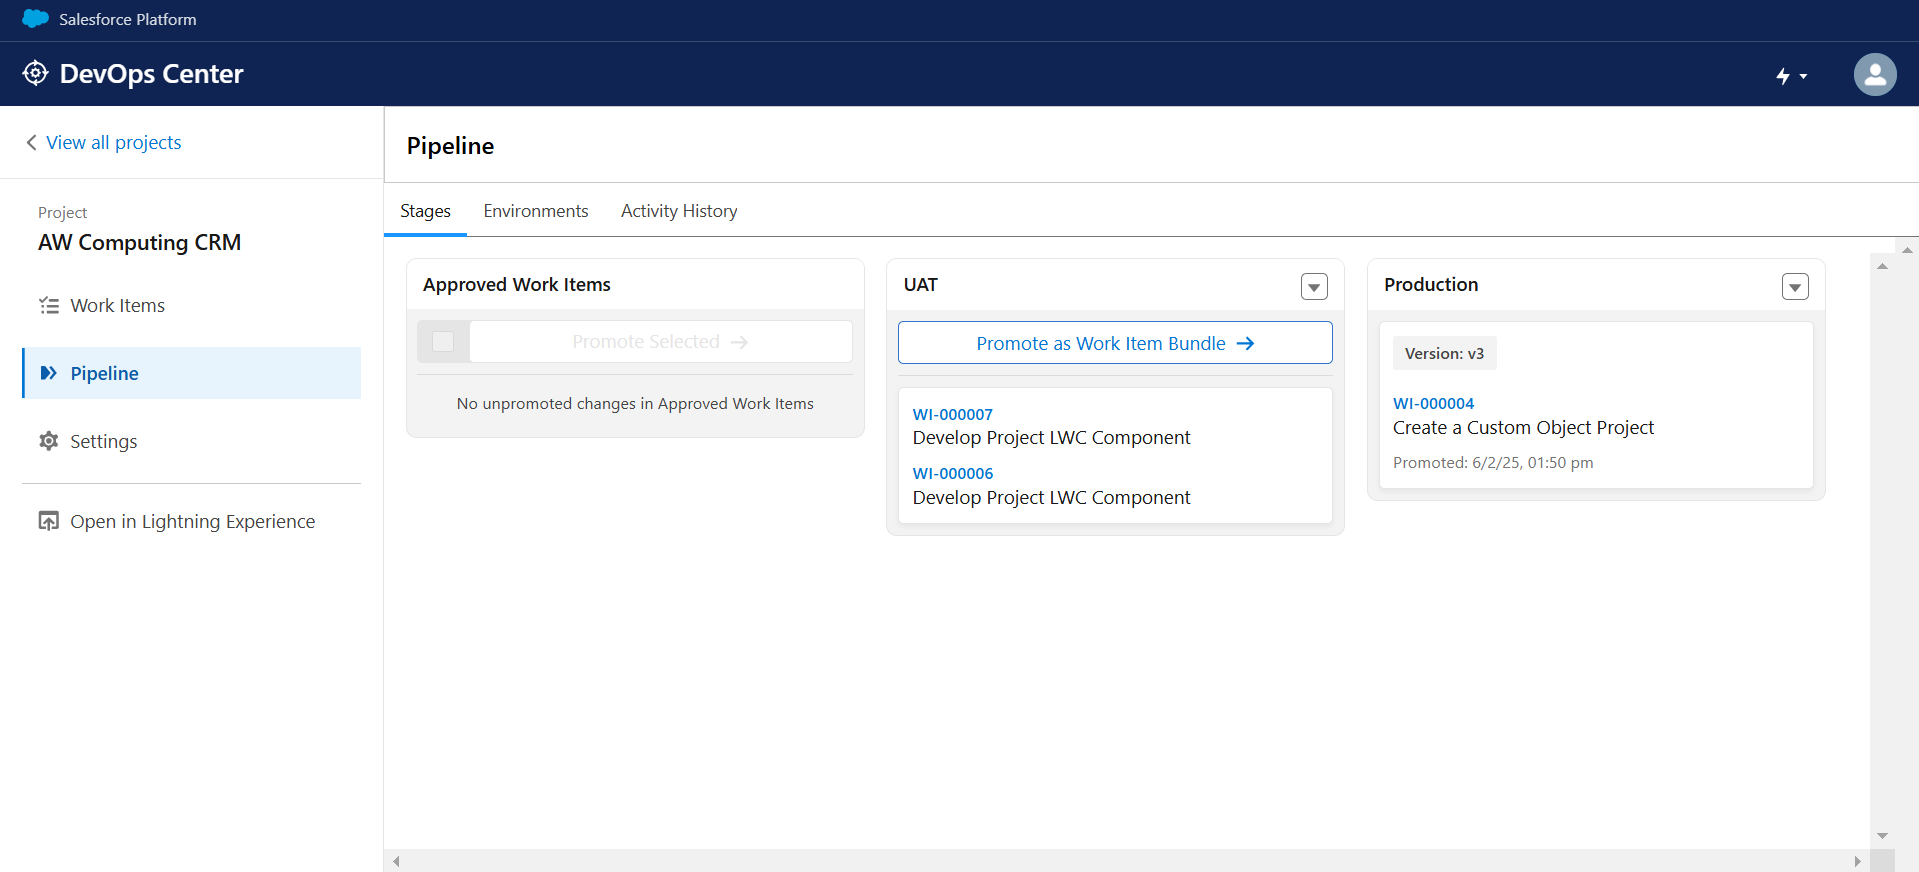
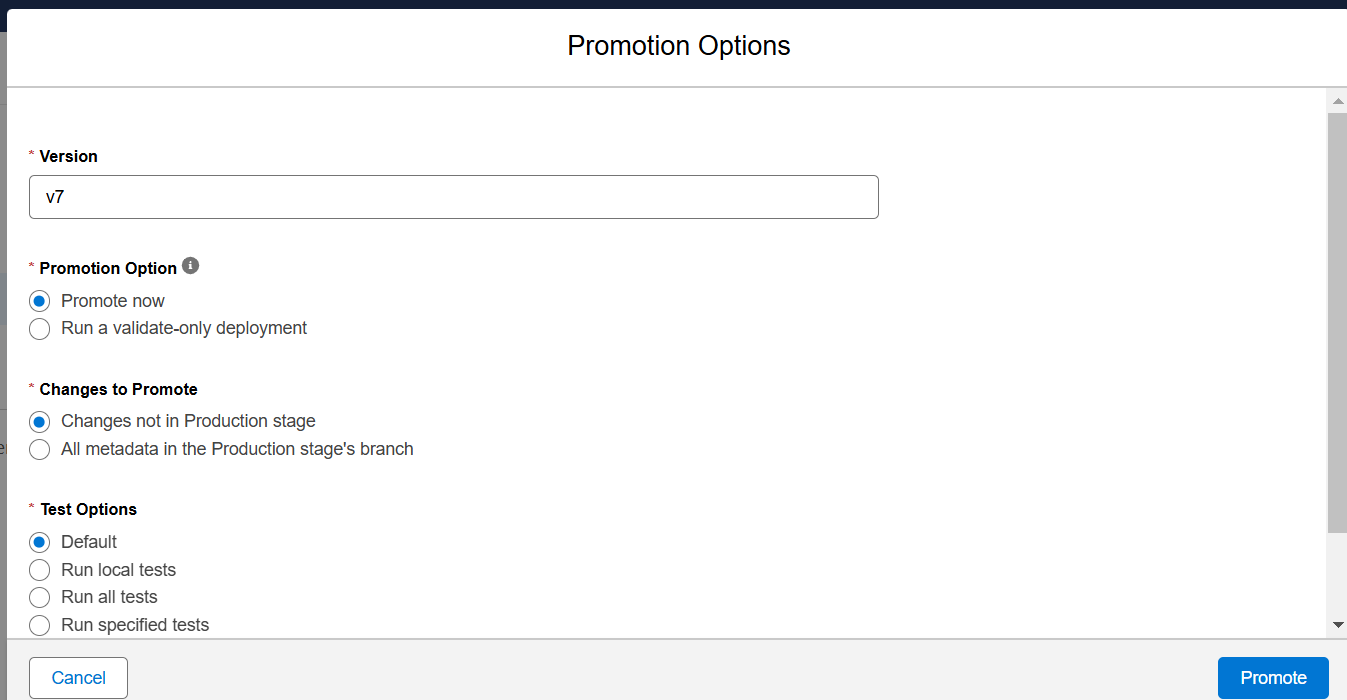
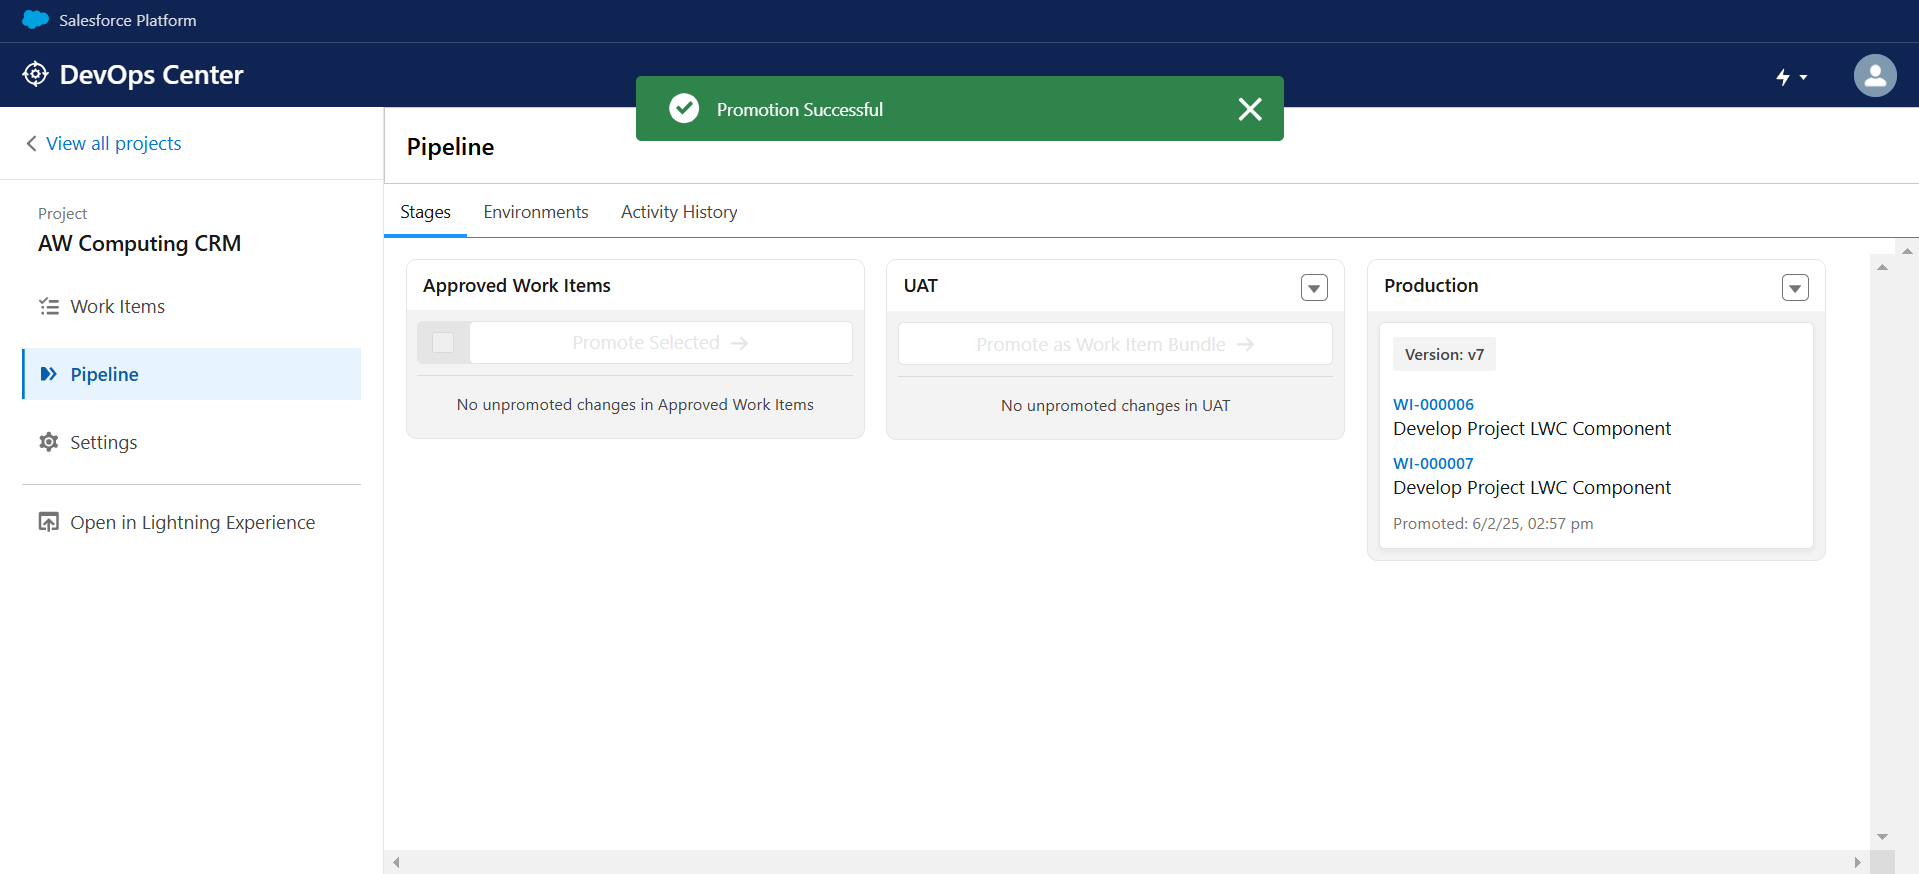
Step 7: Promote Changes to Production
– After successful testing in the UAT environment, the release manager promotes the changes to the Production environment (main branch).
– The changes are deployed to the Production org, completing the CI/CD process.
Step By Step Implementation
Install and Configure DevOps Center
- Install DevOps Center in your Salesforce org. https://help.salesforce.com/s/articleView?id=platform.devops_center_setup_install.htm&type=5
- Assign yourself the following permission sets: DevOps Center, DevOps Center Manager, DevOps Center Release Manager, sf_devops_InitializeEnvironments, sf_devops_NamedCredentials
- Go to App Manager → Create a Connected App with API access to DevOps Center.
Enable DevOps Center and Source Tracking
- Log into your Salesforce Production Org.
- Go to Setup → Platform Tools → Development → DevOps Center.
- Enable Source Tracking to automatically track changes.
Step 2: Create Sandboxes for Development and UAT
- Navigate to Setup → Sandboxes.
- Create two sandboxes
Dev Sandbox (for development work)
UAT Sandbox (for testing before production deployment)
Set Up the DevOps Pipeline
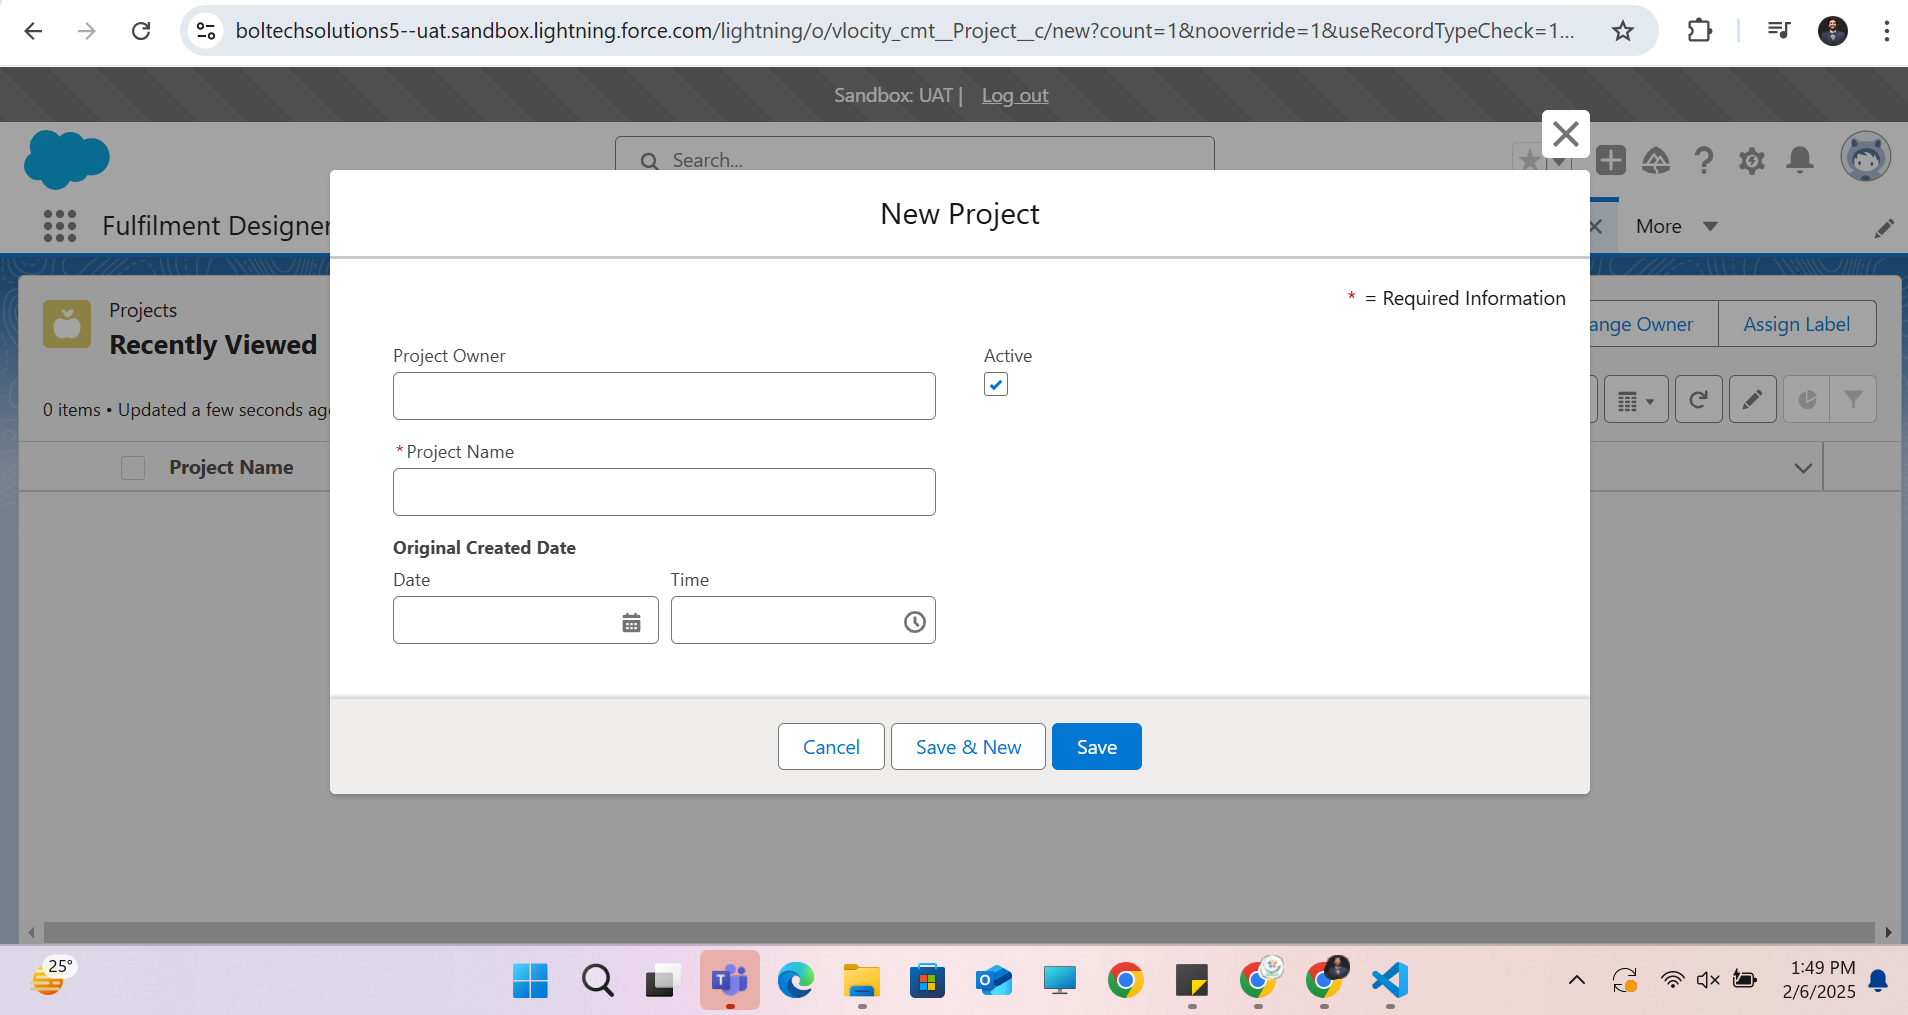
- Open DevOps Center from the App Launcher.
- Click New Project and connect to your GitHub account.
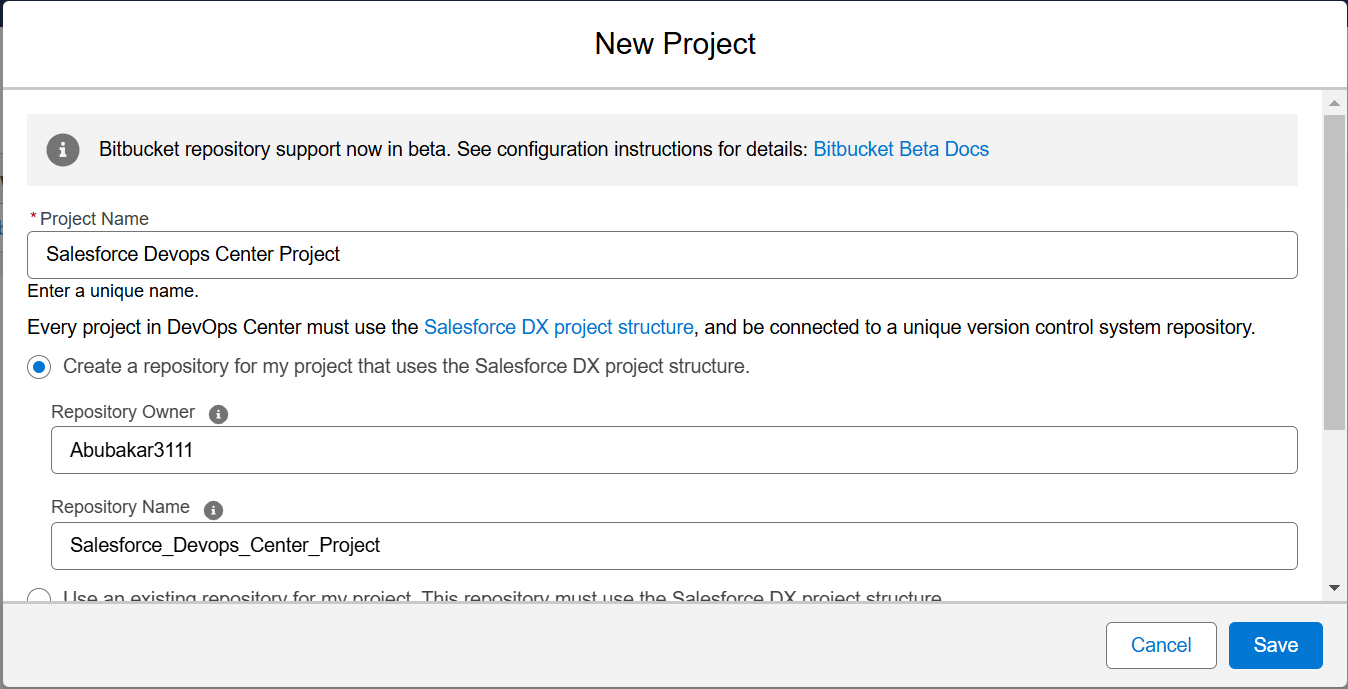

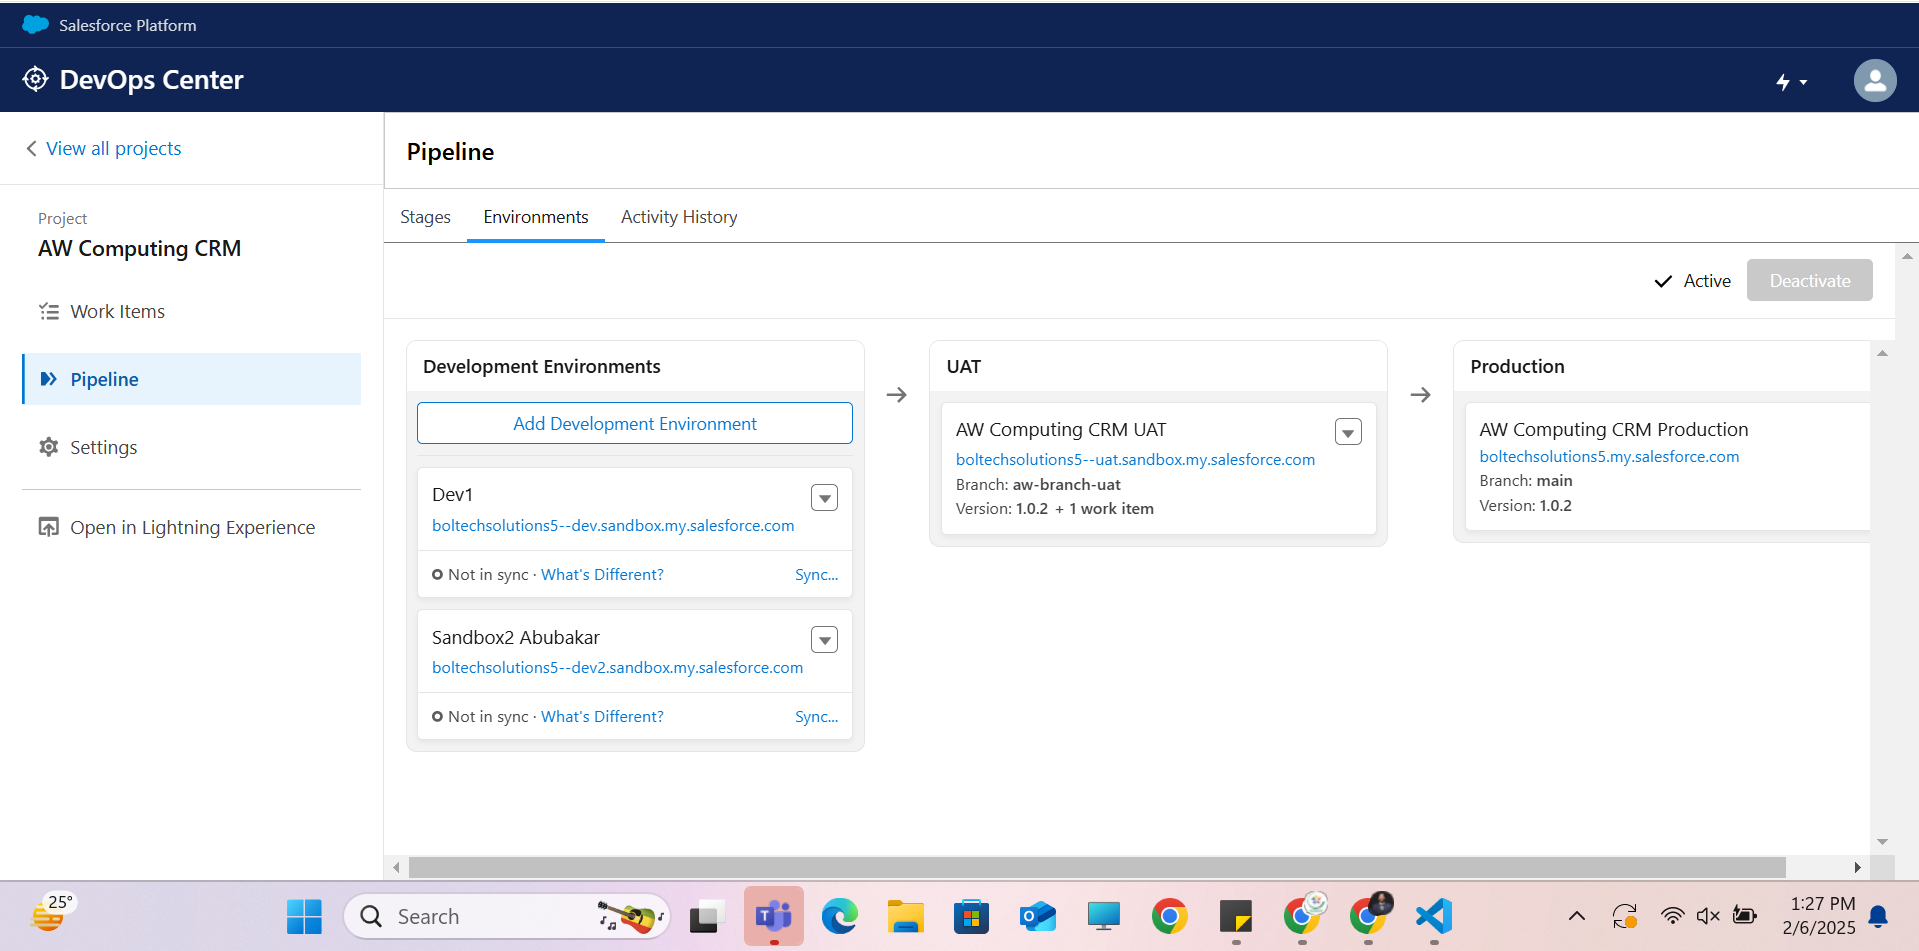
- Define your pipeline stages:
- Dev → UAT → Production
- Remove unnecessary stages like Integration/Staging if not needed.
- Assign GitHub branches to each stage.
- Activate the pipeline.
Create a work item in DevOps Center (e.g., adding a new custom object).
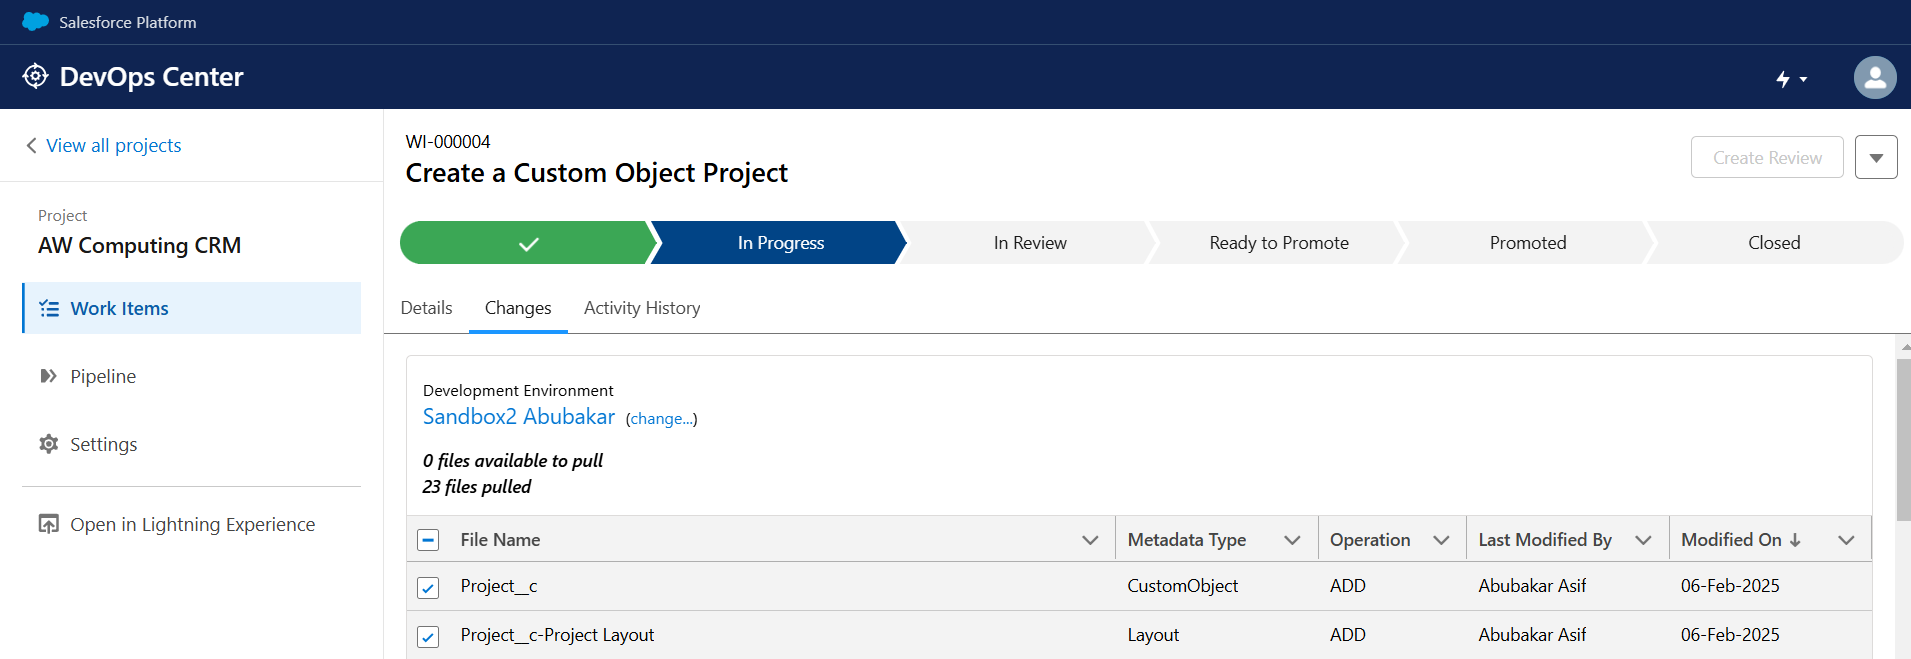
Approach 1: Inside Salesforce DevOps Center
Go Inside Work Item and start working

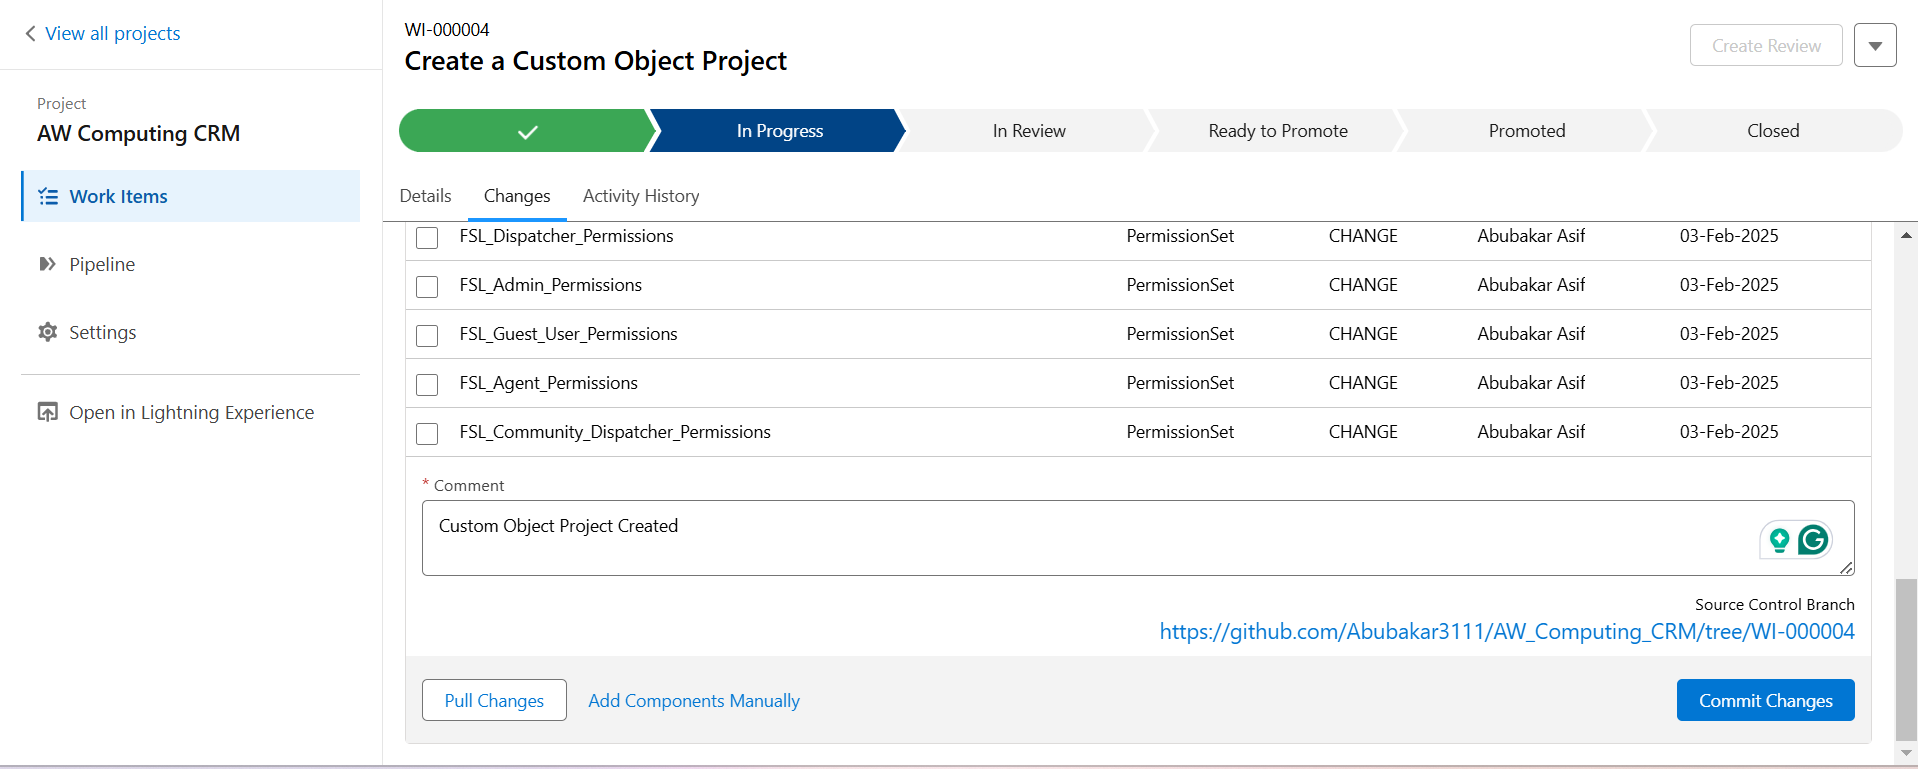
- Make changes in Dev Sandbox and commit them.

- Click Pull Changes in DevOps Center and create a review.

- Once approved, promote changes to UAT Sandbox.
- After UAT testing, promote to Production.

Approach 2: Outside Salesforce DevOps Center (Using VS Code & GitHub)
For developers who prefer greater control over CI/CD or want to integrate DevOps Center with manual workflows, this approach involves pushing changes to GitHub from VS Code and triggering deployments via Pull Requests.
- GitHub Repository for the project(Already Created when new project is created in devops Center).
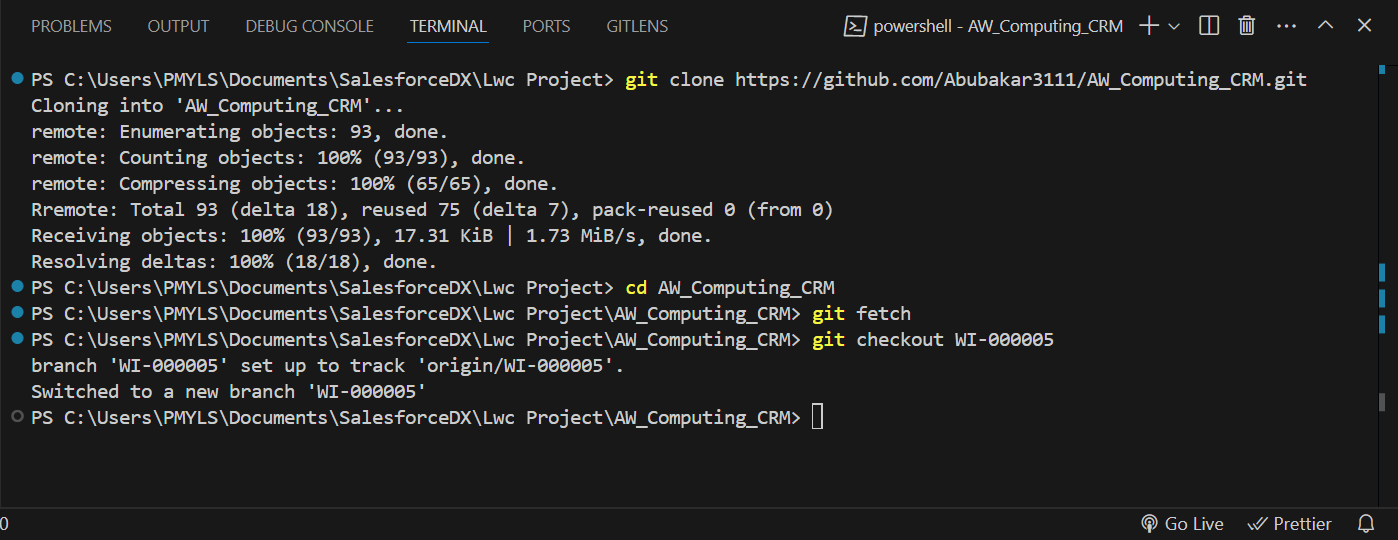
- The developer clones the repository to their local machine using VS Code.
Step 2: Retrieve and Modify Code Locally
- Retrieve metadata from Salesforce Org
- Step 2: Create a Local Branch
- The developer creates a local branch in VS Code to work on the assigned project branch.
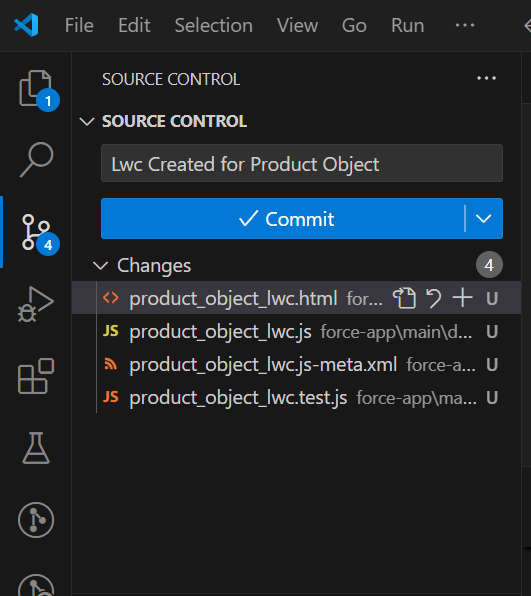
- Make changes to the Salesforce project, such as creating custom objects or Apex classes.

Step 3: Push Changes to GitHub
- Once the changes are complete, the developer pushes the code to the assigned project branch in GitHub.
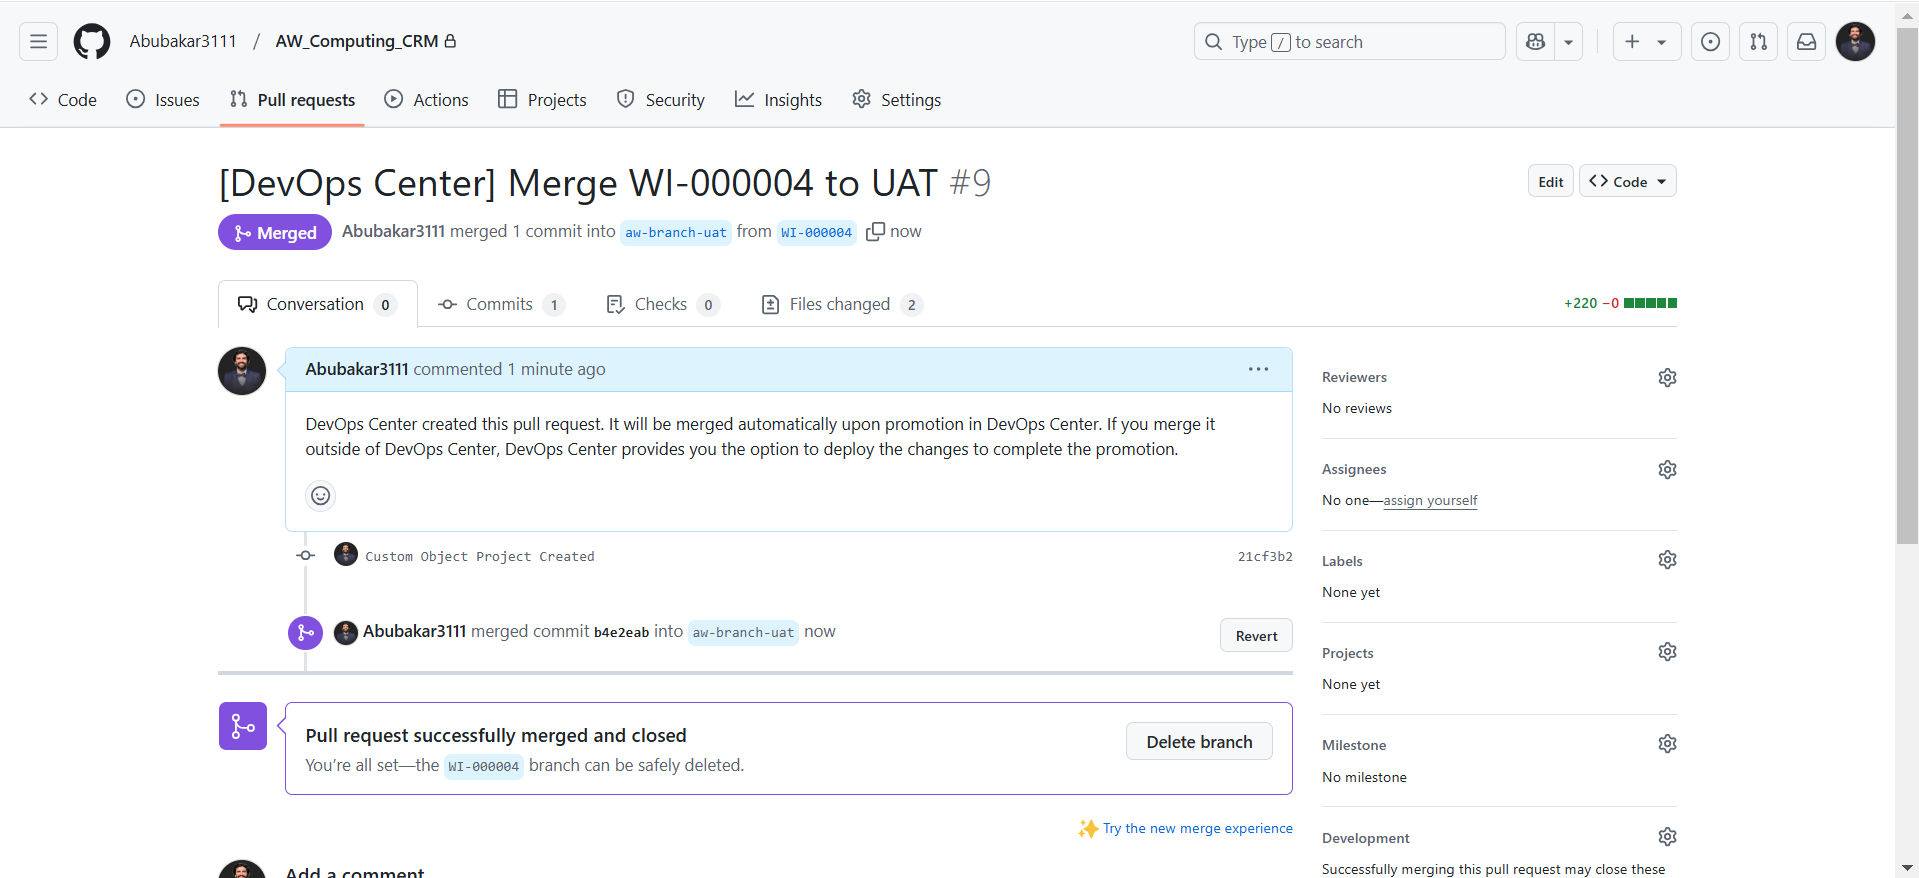
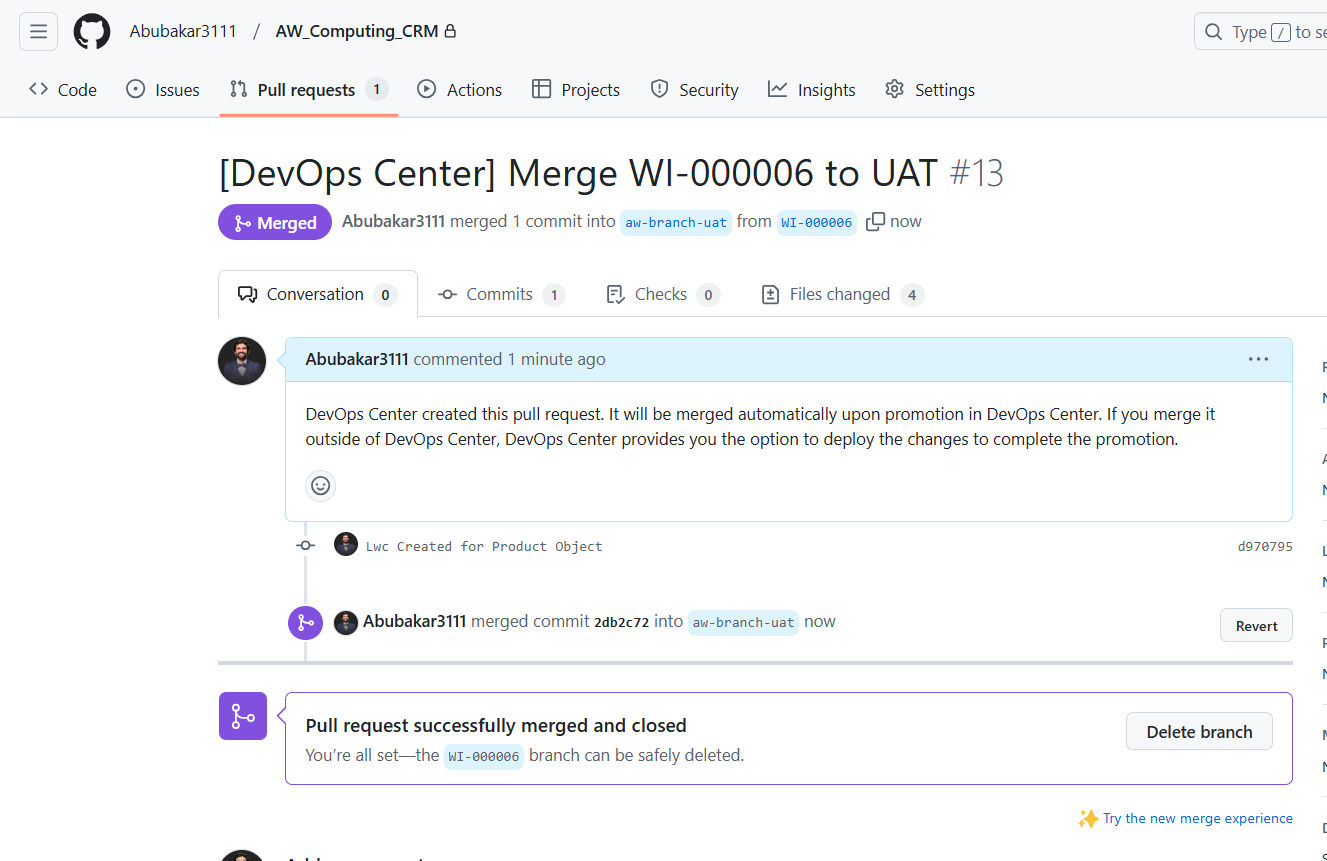
- Create a pull request in GitHub for code review.

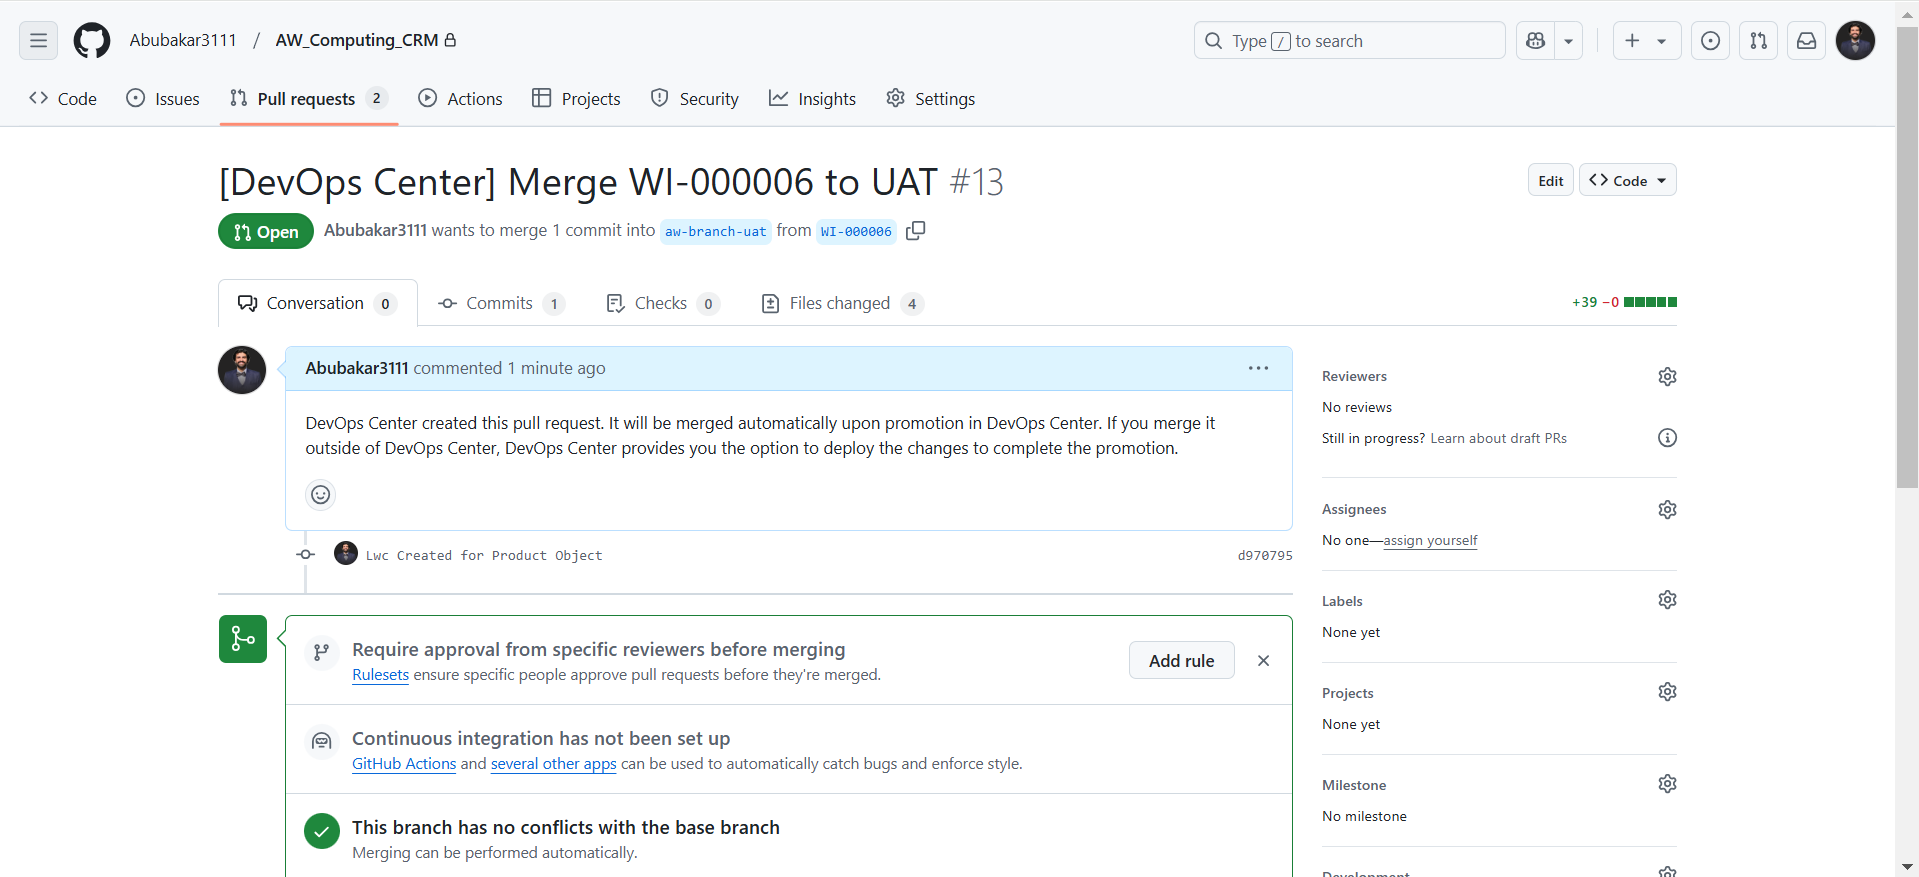
Step 4: Code Review and Testing
- The admin or another team member reviews the pull request in GitHub.
- Once approved, the changes are merged into the UAT branch.
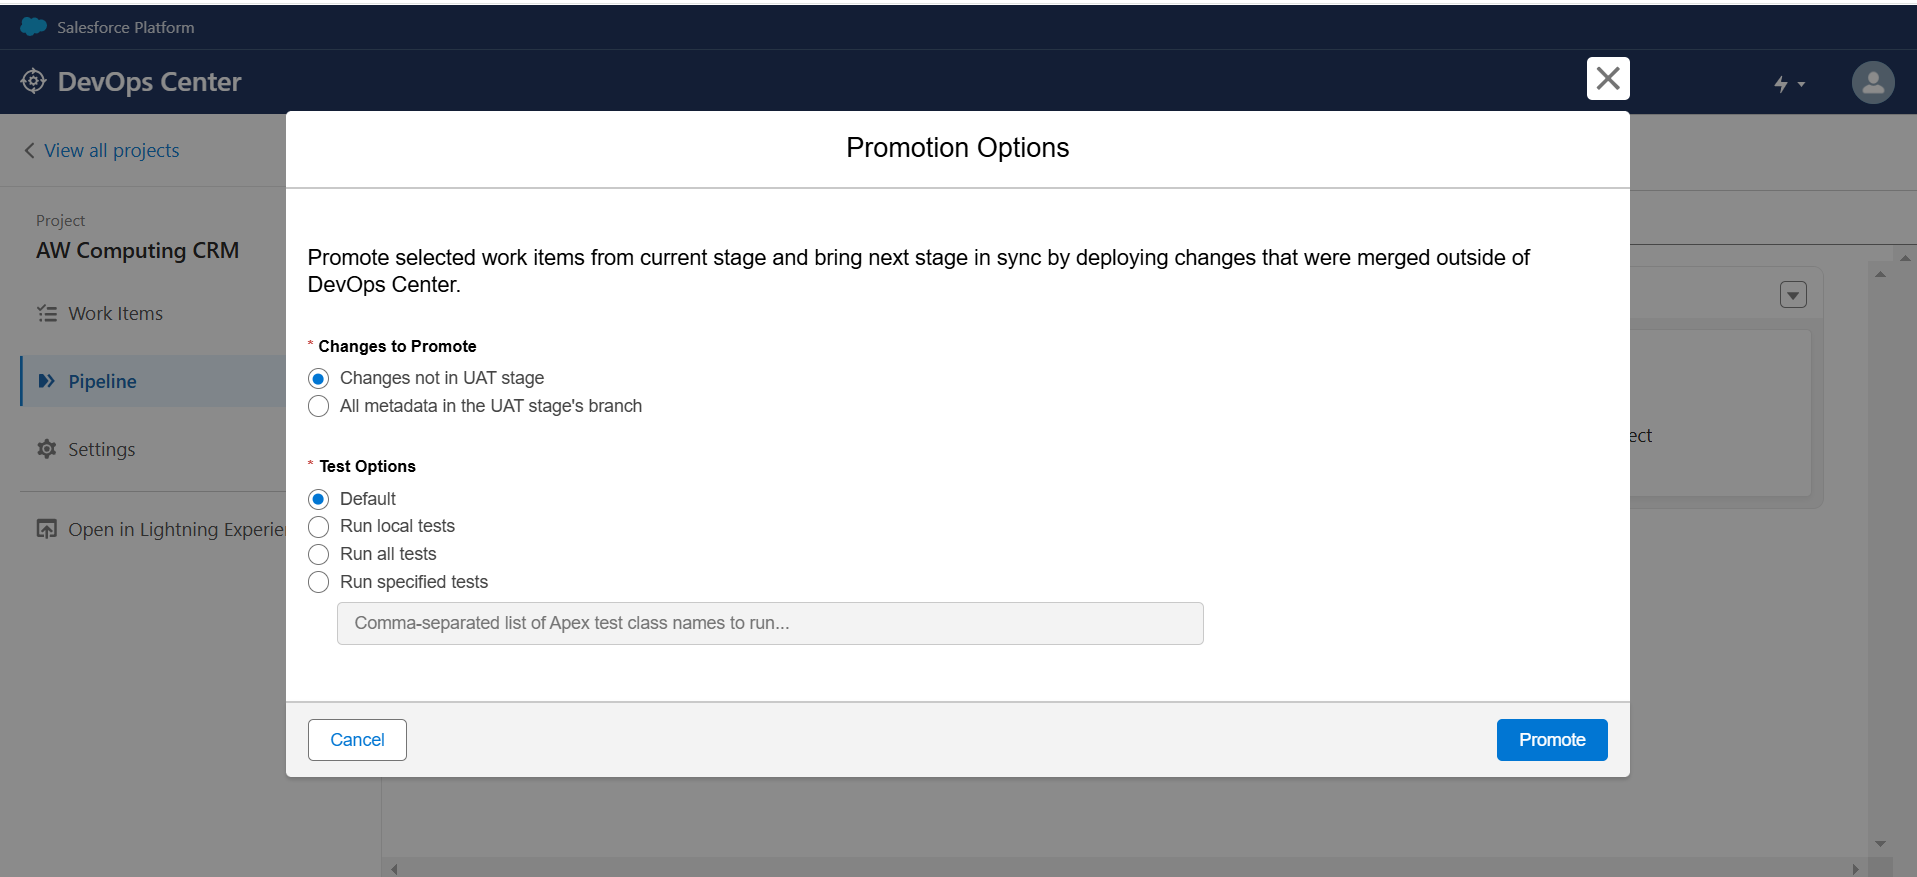
Step 5: Deploy to UAT and Production
- After successful testing, deploy the changes to the production org using Salesforce CLI.
Benefits of Using Salesforce DevOps Center, GitHub, and Salesforce CLI
- Streamlined Development Process: Both approaches provide a structured way to manage Salesforce custom development, from coding to deployment.
- Automated Change Tracking: Source tracking in DevOps Center eliminates the need for manual deployment items, reducing errors and saving time.
- Collaboration: GitHub enables seamless collaboration among team members, with pull requests and code reviews ensuring code quality.
- Flexibility: The ability to choose between a Salesforce-native solution (DevOps Center) and a more developer-centric approach (VS Code + GitHub) provides flexibility for different team preferences.
Conclusion
Salesforce custom development with CI/CD powered by Salesforce DevOps Center, GitHub, and Salesforce CLI offers a robust framework for managing complex projects. Whether you prefer working inside the DevOps Center org or using external tools like VS Code and GitHub, both approaches provide efficient ways to streamline your development and deployment processes.
By leveraging these tools, you can ensure faster delivery of high-quality Salesforce applications, while maintaining control over your development pipeline. Whether you’re a low-code enthusiast or a seasoned developer, Salesforce DevOps Center and GitHub integration provide the flexibility and power you need to succeed in today’s competitive landscape.